Fitting a chainring to your bike is a relatively simple task, but you will need to ensure that you get the correct size for your crank. There are several standards out there for what is known as the Pitch Circle Diameter (PCD) of the mounting bolts.
Campagnolo, for example, uses 112mm and 145mm, while Shimano uses 110mm – so make sure you get the right one!
There’s also the fact that many cranksets now use a specific matching chainring that will only fit that particular style or model. However, once you’ve identified the correct part, almost all fit in a way similar to that described below.
So if a chainring needs replacing because it’s worn, the wrong size or in need of a clean, here’s how you do it…
How to replace a bicycle chainring
Time take: 20 minutes
Money saved: £10
What you’ll need: 5mm Allen key, grease, torque wrench
Step 1 – Remove the chainset


Once you’ve removed the chainset (Read our guide on how to do that here) locate the chainring bolts on the crank. These are usually fitted using a 5mm Allen key and should be screwed on very tightly – so don’t be surprised if you can’t undo them with a simple flick of the wrist.
Elbow grease will be required!
Step 2 – Loosen the bolts


Using the 5mm Allen key, undo the bolts by turning them in a counterclockwise direction. If any are really stuck, give them a quick blast of penetrating spray to loosen them up.
Older style cranksets where the chainring bolts don’t screw directly into the spider might require the use of a peg spanner to hold the back of the nut and prevent it from turning as you undo them.
Step 3 – Remove the rings


Once you’ve removed the bolts and put them to one side, remove the chainrings for cleaning or replace them with new ones. You can tell if a chainring needs replacing by the profile of the teeth – if they are pointed like shark’s fins, it needs replacing.
If you are cleaning it, spray with a dedicated cleaner, leave it for a minute to soak in then scrub down with a stiff brush.
Step 4 – Clean and grease the bolts


Use a degreaser to clean the bolts. Before reinserting them, give them a quick coat of decent-quality fresh grease and apply some to the boltholes, too.
This will not only prevent the bolts from seizing up but will also stop them from drying out – leaving your bike less susceptible to creaking and squeaking. It’ll also mean they’re easier to remove next time you do this job.
Step 5 – Inspect the chainring

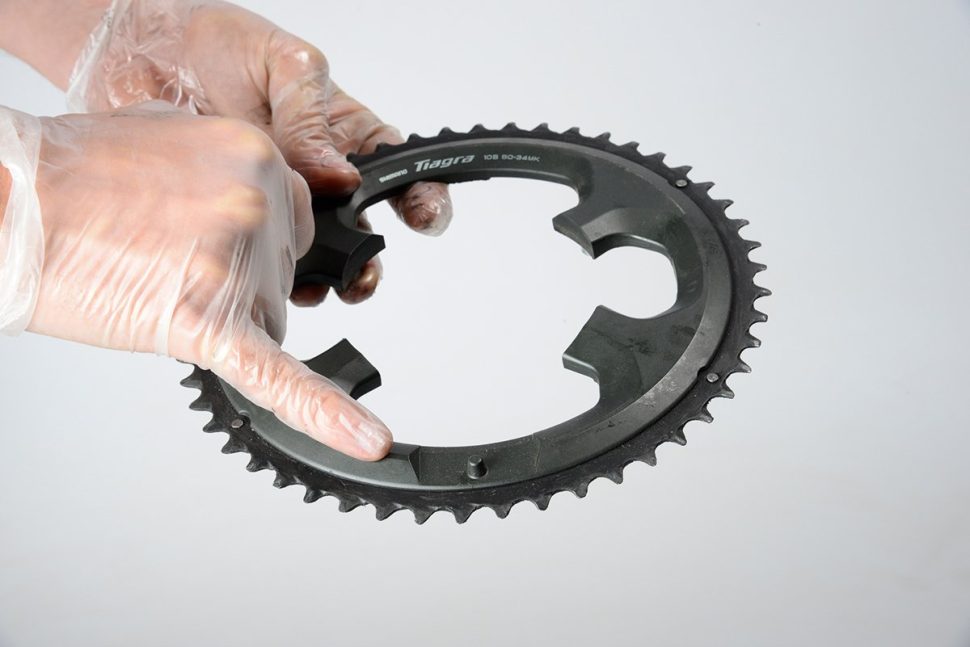
Examine the chainring for an alignment arrow, which indicates where it needs to line up with the crank. Otherwise, use the chain pip as a guide – this is the small grommet that’s designed to stop the chain getting stuck if it comes off the big ring.
This will need to be mounted behind the crank.
Step 6 – Put it all back together


Finally, screw the bolts back in and – using a torque wrench – check you have tightened them up sufficiently by listening out for the torque wrench to click.
Loose chainring bolts can create annoying clicking noises around the bottom bracket and – over time – can work themselves free. Which is not good!


