Changing tyres is a fact of life for any cyclist, be it worn out treads or simply the inevitable punctures we all encounter at some point.
But changing a tyre or inner tube doesn’t have to be a major chore. As the video above shows, learning some simple techniques means saving all the struggle and you don’t even need tyre levers for the majority of setups.
Follow our steps and you can have your flat fixed, or tyres swapped, in no time.
How to change a tyre and inner tube without levers like a pro
1. Move all the slack round to one place


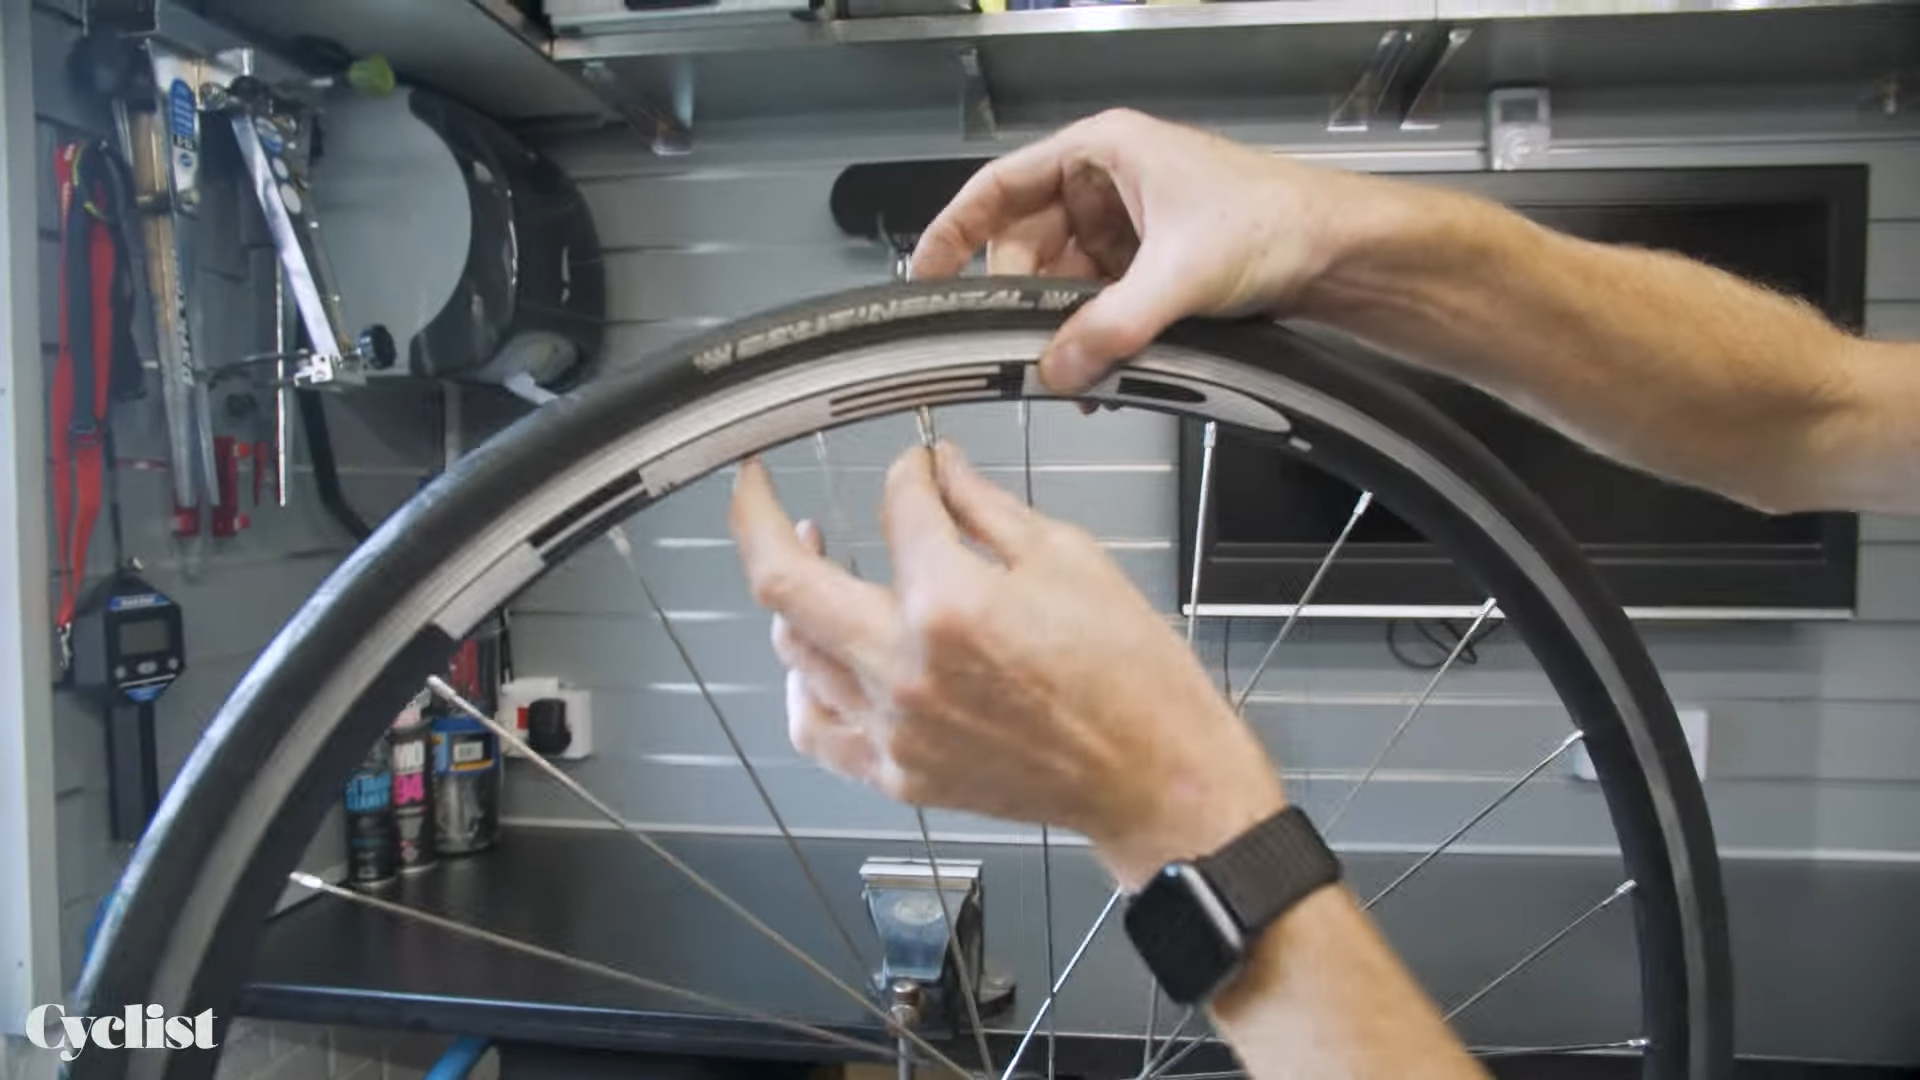
The key to being able to remove a road bike tyre quickly and efficiently is getting all the slack that exists between the rim and the tyre into one place.
The technique is to work around the bead of the tyre systematically, unlocking it from the rim (as often you’ll find it stuck) and then gripping and pulling with your fingers and thumbs working towards a single point; ending opposite the valve works best.
Note: If you end up at the valve you won’t be able to push the tyre off.
2. Use the slack you’ve created to push the tyre off the rim


With a ‘slack’ point established, hold onto it as you support the wheel between your feet on the floor, and then starting with your thumbs begin to push the tyre bead sideways off the rim. Once you’ve got it started you can use the palm of your hand, in an outward rolling motion, to be a more effective lever.
Note: Sometimes this requires a fair amount of force and good technique, which will only come with practice.
Also note: some tyre and rim combinations are tougher than others. It’s a good idea to try your particular setup at home first, so you are not doing this for the first time on the side of a busy road in the pouring rain.
3. Push the rest of the tyre off the rim, check for debris


Once you’ve got a section of the tyre over the edge of the rim it should be fairly straightforward to continue and push it all the way off.
At this point, if you’re at the roadside due to a puncture, now is the time you need to thoroughly check inside the tyre carcass for the offending thorn/flint/shard of glass or whatever has caused the flat.
Beware: sharp bits of glass poking through can also cut fingers!
4. Refit the tyre on one side


To refit the tyre: start with pushing on just a single bead so the tyre is held in place. It’s a nice touch to align your tyre logos with the valve and it can make locating future punctures easier. Details count.
5. Slightly inflate the tube


Before trying to fit the new tube, the best tip I can offer is to inflate it slightly.
It’s really important the tube has some air inside as this will make it hold its ’roundness’ and shape which makes fitting it so much simpler, and significantly reduces the chance of pinching the tube during fitting.
6. Insert the new inner tube


Pop the valve in first and then guide the inner tube into the tyre carcass. Immediately you will notice how much easier this is to achieve with the partially inflated tube, rather than a dead flat one.
Check the inner tube is completely within the rim bed all around.
7. Fit the second side of the tyre


Place the wheel on the floor once more, valve at the bottom, and begin opposite (at the top) working the bead of the tyre back into the rim bed with your thumbs.
As per the tyre removal technique, try to work the slack around with you as you push the tyre bead in. With practice this will become second nature.
At the end point (try to finish at the valve) it may look like the tyre will not fit, but trust me it will. It just needs a good shove.
Strong thumbs are helpful, but it’s good technique not brute strength that makes this easy. Again, practise!
If necessary go back a few more times, working the slack around once more and pushing a little more of the tyre on each time.
Tip: Little bites are helpful – ie, push a bit on at a time, don’t try and push a huge chunk over in one go. You’ll just end up frustrated and with very sore thumbs.
8. Push the valve up

Why you should finish at the valve: Once the final part of the tyre is seated end by pushing the valve stem upwards (into the rim) to ensure the tube is not trapped here (where it is usually thickest).
9. Final visual check


I’d advise one final visual check around the entire bead to check no part of the inner tube is trapped before inflation. But this should never be a worry if you have put sufficient air/shape into the tube in the first place, as it won’t lie flat.
10. Pump it up


Now you’re ready to inflate, using your mini pump or CO2 inflator if you’re at the roadside, or your track pump at home.
Ready to attempt something tougher than changing an inner tube? Read our guide on how to build a home workshop


