
Your freehub is the part of your bike that lets you coast and, in some cases, makes a pleasing clicking sound as you do it. It’s also the interface between your cassette (i.e. your rear gears) and the hub of your rear wheel. Freehubs are mechanically quite simple objects, but they perform a critical function and are subject to considerable stresses.
In this guide we’ll explain exactly what a freehub is, how it works, the different types you might encounter on road bikes and gravel bikes, and general maintenance requirements.
Need some help with the basics before you dive in? Head to our beginner’s guide to the parts of a road bike.
What is a freehub? Freehub vs. freewheel explained
Almost all bikes have some form of freewheel mechanism. This clever system lets you push the pedals to power the bicycle but allows you to coast without them continuing to turn.
Achieved via a ratcheting mechanism connected to the rear hub, as you apply force, the ratchets engage and drive the bike forward. When the bicycle’s speed exceeds your ability to pedal faster (sometimes referred to as spinning out), or any time you stop pedalling, the ratchets disengage.
Allowing the pedals to remain stationary as the bike rolls on, the ticking noise you can sometimes hear when coasting is the sound of the disengaged ratchet mechanism.
On older bikes or very cheap modern ones, this ratcheting mechanism is contained alongside the sprockets in a single component called a ‘freewheel’. This component then screws directly onto the rear hub.
By comparison, on modern bicycles, the ratcheting mechanism is more likely to be contained within the hub itself. This system is known as a ‘freehub’. The cassette comprising the bike’s sprockets fits onto the freehub body.
Both systems achieve the same effect. However, the sturdier and more serviceable freehub system is now near-universal on better quality bicycles.
Ratchets, pawls, and bearings


Most freehub systems use a combination of spring-loaded pawls on the freehub body, which engage with a ring of fixed ratchet teeth inside the hub shell. At its most basic, this combination of moving pawls and fixed ratchets is used in everything from zip ties to rollercoasters.
On a bicycle, the ratchet ring inside the hub gives the pawls something to engage with as you pedal. They then transfer your pedalling power via the spokes, through the tyres, and onto the road.
The pawls perform a dual function. Spring-loaded, they automatically push up against the angled ratchets. As you pedal, they lock in place to transfer power, yet once you stop applying force, they disengage and instead allow the ratchet teeth to slip over them.
Essentially the hub shell and freehub body can either engage to form a single entity, or disengage, to become rotate separately and at different speeds. For this reason, it’s often straightforward to slip the freehub body from the hub itself.
Regardless of design, both the hub and the freehub will be supported along the axle by bearings. More expensive modern hubs tend to use cartridge bearings in both parts, often resulting in more easily disassembled designs. The alternative is to use cup-and cone-bearings which take more effort to deconstruct but can be more extensively adjusted.
Different hubs use different bearing arrangements to balance supporting the load pushed through the hub with the need to keep weight low.
Points and angle of engagement

The number of pawls and ratchets inside your hub can also vary. Hubs will always have at least two pawls, while some will have as many as six.
These combine with the number of ratchets in the hub shell to give you the number of possible points of engagement, i.e. the number of different positions in which drive is engaged.
The more points of engagement, the quicker the hub will be to start transmitting power once you begin pedalling. The maximum the wheel can rotate before being driven forward is called the angle of engagement.
A hub with two pawls working in tandem and a hub with 36 ratchets would have an angle of engagement of 10°; this is because a complete 360° rotation of the wheel divided by 36 ratchets is equal to 10°.
However, as you increase the number of ratchet teeth, you make each individual tooth smaller. At some point, these ratchets become too diminutive to support the power created by the rider. The best hubs, therefore, balance fast engagement with steadfast power transfer. Some pawl designs spread the load across multiple teeth simultaneously.
Alternative systems


This fundamental arrangement of ratchets and pawls can take various forms, all of which end up doing much the same job.
For instance, on some Mavic wheels, the traditional locations of the parts are reversed. This sees the pawls attached to the main hub while the ratchets are contained within the freehub.
Increasingly, there are also different types of ratchet mechanisms employed. One common type on high-end wheels is the star ratchet.
This design does away with pawls and instead uses two matching springloaded ratchet rings pushed together. Turned one way, drive is engaged, turned the other, the rings slide past each other thanks to angled teeth. Popularised by DT Swiss, potential benefits include greater simplicity, easier servicing, and improved reliability.
Shimano freehubs explained


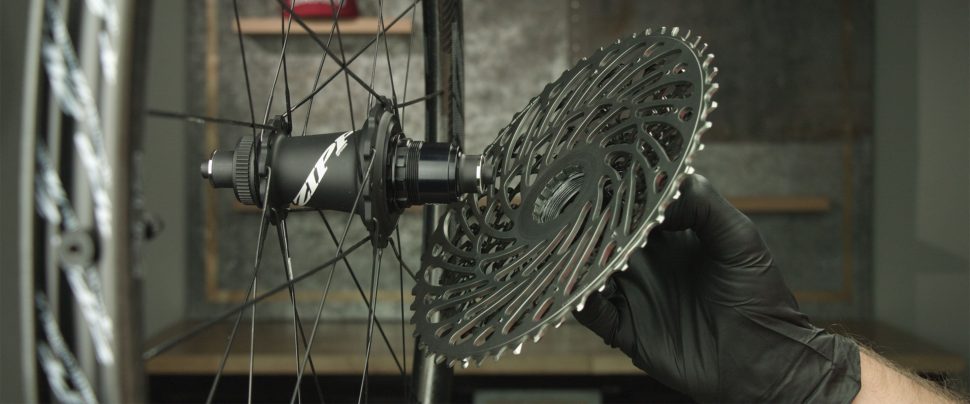
As mentioned earlier, a key role of the freehub body is to accept the cassette. This collection of cogs is slid onto the splines on the outside of the freehub body before being secured in place using a lockring.
Annoyingly, not all cassettes will fit on all freehubs, even if they have the same number of sprockets. Shimano and SRAM generally used the same HyperGlide (HG) freehub design for a number of years, meaning their cassettes were largely interchangeable before the advent of 12-speed systems.
Always one to go its own way, Italian maker Campagnolo uses a different system. One result of this is that the term ‘Shimano freehub body’ can mean both a freehub body made by Shimano or any freehub body compatible with a Shimano or SRAM cassette.
However, many wheels can be used with either system, so long as you’re prepared to change the freehub body. If you’re looking to replace or service the freehub on your wheels, you also need to be aware that you’ll require the specific parts compatible with your hub, as most are not interchangeable.
Shimano 8, 9, 10, 11-speed freehubs
As the number of sprockets on the average cassette has grown, the space allocated to the freehub body has increased. The earliest Shimano freehub systems had a short spacing that only worked with a 7-speed cassette. However, the vast majority of hubs in use today use a freehub body that will accept 8, 9, 10 and 11-speed cassettes.
Just be aware that you might need to use the appropriate spacer to fill any room left once the cassette is in place.
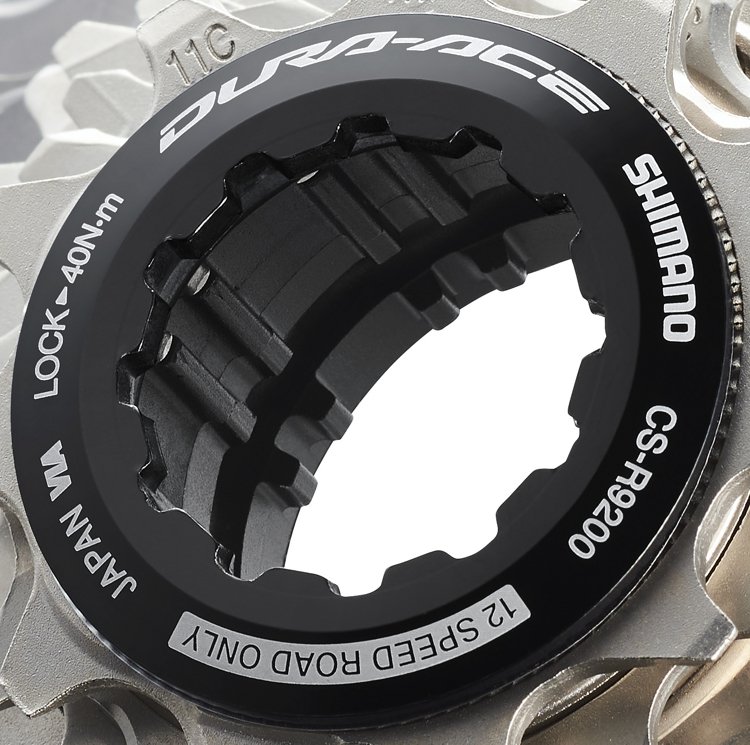
Shimano 12-speed freehubs

While older systems enjoy a high degree of cross-compatibility, the hunt for ever more gears means some of the latest systems have abandoned the traditional freehub design.
Playing around has allowed groupset makers to fit in more sprockets, making it feasible to accommodate sprockets smaller than the minimum 11-tooth size possible on a standard diameter freehub.
Happily, although Shimano now uses a system called Microspline on its 12-speed mountain bike products, its 12-speed road-going groupsets have stuck with a conventional freehub.
This means most of us will be able to bolt its latest 12-speed Dura-Ace and Ultegra groupsets straight onto our existing wheels. The trade-off is that 11t remains the smallest possible sprocket.
Shimano also introduced a new 12-speed only freehub design when its latest groupsets launched, so while 11-speed wheels are usually compatible with 12-speed groupsets, the latest Shimano 12-speed wheels are not backwards compatible with 11-speed groupsets. Confusing, eh?
- Related reading: Buyer’s guide to Shimano groupsets
SRAM freehubs explained

Functionally, SRAM and Shimano freehubs were identical before 10-tooth cogs and 12-speed components came along and confused matter. Like their cassettes, both use the same spacing and spline design, making them pretty much interchangeable. Sometimes wheels will be listed as both SRAM and Shimano compatible; however, if the wheel uses a conventional cassette, you can assume a Shimano compatible wheel will also work with SRAM.
SRAM road freehubs up to 11-speed
Up to 11-speed, SRAM freehub bodies use the same versatile HG design first patented by Shimano. However, from 11-speed upwards, things get trickier. Some SRAM 11-speed groupsets use the HG standard.
However, those with a smaller 10t minimum sprocket now use SRAM’s XDR driver. This design is free to licence and occupies the same space as an 11-speed HyperGlide road driver but allows for a smaller 10t sprocket. Often retrofittable to your wheels, the process for attaching and removing your cassette using a chain whip and lockring tool remains the same.
SRAM’s XDR driver and 12-speed groupsets

As mentioned above, some SRAM 11-speed groupsets will use the XDR standard. However, all its 12-speed groupsets employ this standard. Supporting the firm’s lighter one-piece cassettes, more petite sprockets, and greater overall range, this is one of the reasons SRAM has been able to shrink the size of the chainrings on its road cranksets.
Campagnolo freehubs explained


Campagnolo uses different size splines and different pattern lockrings to attach its cassettes. Beyond making them incompatible with Shimano or SRAM, most other elements remain the same. Most wheels will come with the option to fit a Campagnolo compatible freehub body. Depending on the brand you buy, this might also be an option when purchasing.
Campagnolo road freehubs up to 12-speed
Campagnolo’s Ultra-Drive standard is compatible with 9, 10, 11 or 12-speed cassettes. If using a 12-speed system, be sure that the starting sprocket is no smaller than 11t. Campagnolo 12-speed cassettes with smaller first sprockets will not be compatible.
Campagnolo N3W freehub


Bringing a 13-speed drivetrain to the market forced Campagnolo to create a new freehub standard called N3w. Cleverly, this leap forwards also offers significant backwards compatibility.
Besides accepting the Ekar gravel groupset‘s remarkable one-piece cassette with its tiny 9-tooth smallest sprocket, the N3W freehub also works with its 10, 11, and 12-speed cassettes.
It manages this thanks to a small central section of splines which can be extended via a cassette body extension ring, which Campagnolo calls the AC21-N3W adapter. Also requiring an elongated lockring, one upside is that wheelmakers are likely to switch wholesale to this standard from now on.
How to service and maintain your freehub


The first tip for maintaining your hub would be to do it somewhere clean, well lit, and with the instruction manual close to hand.
That said, the complexity involved can vary drastically depending on the design of your wheels. Some systems snap apart and together without tools, while some will feature locknuts that require either Allen keys or spanners to undo.
Older systems may even use cup and cone bearings which require careful tensioning to remove play yet allow for a minimum of friction.
Occasionally freehubs, such as those found on cheaper Shimano wheels, will be sealed units. While it’s possible to remove and replace them, it’s not possible to pull them apart to get at the ratcheting bits.
That said, you might have some luck extending their life by submerging them in oil. The alternative to a permanently sealed system is one that comes apart from the main hub body to reveal a series of pawls, springs, and retaining clips. With a tendency to ping off, it pays to be gentle and methodical when dismantling them.
As with many parts, a good idea is first to give everything a clean and degrease. This will allow you to check for wear and order any replacement bits if needed.
In extreme situations, pawls or other components can shatter, while springs or clips can become dislodged or start to lose their ability to rebound. Check yours against a depiction of how it’s supposed to look.
With the freehub removed from the axle, now is an excellent opportunity to also check the bearings in both parts run smoothly. If you can detect any unwanted movement or grittiness, they probably need replacing too.
Seals can become dislodged or degraded, so examine these as well. Assuming everything is in good order, find the correct type and weight of grease or oil and apply it to the bits where it’s needed. Again, an instruction manual is the most important tool here, and it’s generally best to go light on lubrication.
Looking for more bike advice? Head to our how-to section for detailed guides to every aspect of road and gravel bikes, written by Cyclist’s team of experts.


