

As real cyclists, we pride ourselves on knowing how to take care of our machines. Patching tubes for us is the mark of a true cyclist – not just because we’re careful with a penny! It’s the first repair most riders ever attempt, so whether you haven’t patched a tube since childhood – or never learnt in the first place – our quick and easy guide will show you how to do it properly for a repair that lasts…
How to fix a bike puncture in six steps
1. Pump it


Having removed it from the wheel and searched out what caused the puncture, partially inflate the tube. You may be able to hear where the air is leaking. If not, wet your lips and run them alongside the tube – you’ll feel the rush of cold air, helping you to locate the hole.
2. Dunk it
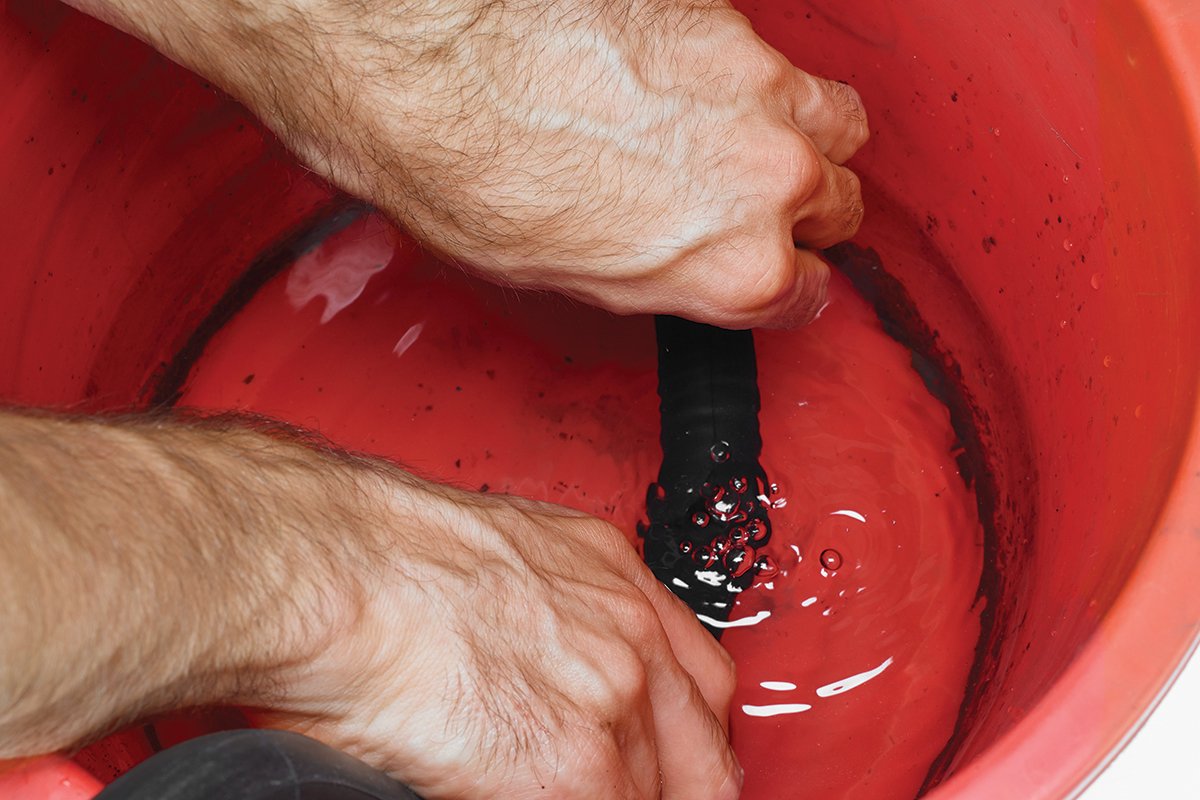

Still can’t find the leak? Submerge the tube. Any emerging bubbles will lead you to the source. If the hole is longer than a couple of millimetres or located around the valve stem, abandon the tube. We repeat, abandon the tube.
3. Prep it


With the hole located, give the surrounding area a quick scuff with a square of emery cloth, taking care to remove any raised edges. Ideally give it a wipe with alcohol or a similar non-oily solvent if possible.
4. Squeeze it
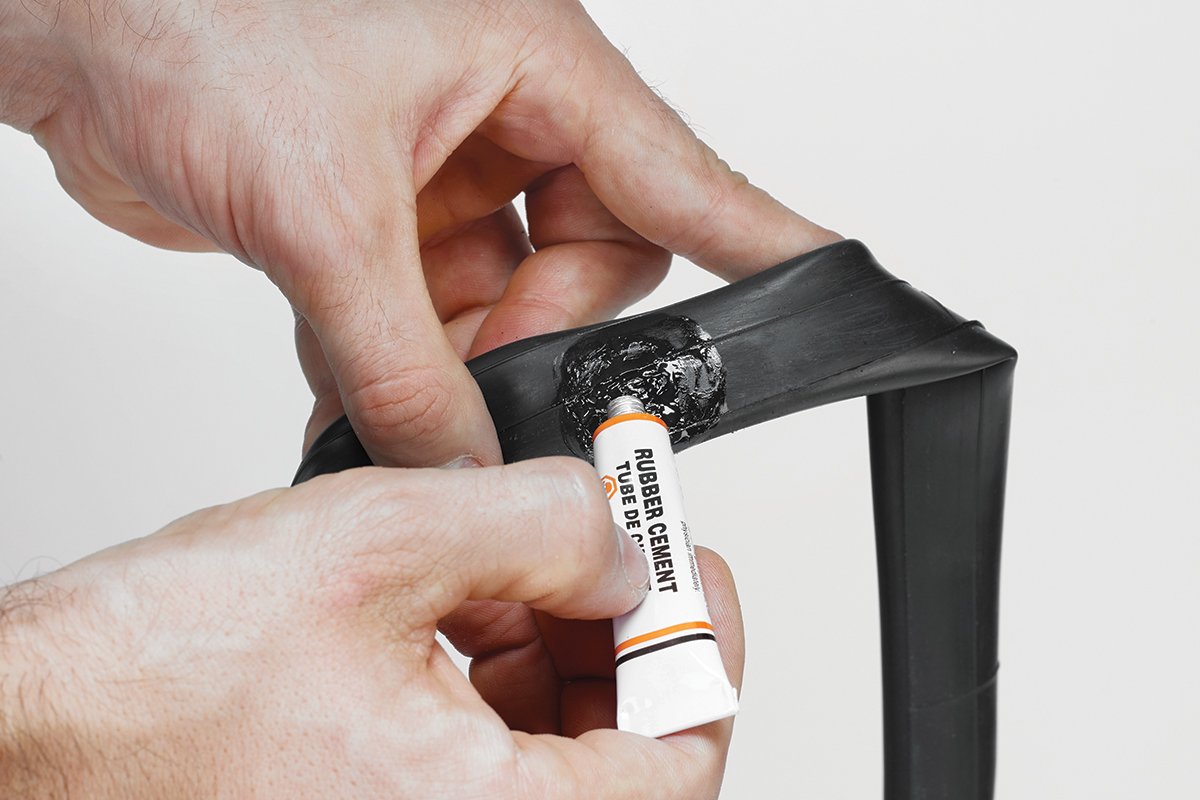

Squeeze the vulcanising solution directly onto the tube. Don’t go mad, a thin layer is sufficient. Leave the solution to cure (dry) for around five minutes. It’ll turn from shiny to dull once it’s ready. Be careful not to touch it.
5. Push it


Apply the patch over the hole. Push down firmly for a minute or two. Then, after 10 minutes remove the backing from the patch. Good quality ones will often split from the centre like a blister – avoid pulling up the edges of the patch.
6. Talc it


Dust the whole area with talc. This’ll stop the tube sticking to the inside of the tyre. Inflate slightly and leave overnight to check the patch is airtight before returning to service. And that’s it, you can now fix tyres. Truly, you are a cycling god!


